Sticky Syrup Bun Recipe

Heyhey


I hope you’ve all had a lovely week :). So based on the fact that my family have started arguing over whether or not we should turn the heating on, I think it’s safe to say that Autumn is officially here. And this could just be me,  but in my head Autumn has always been labelled the ‘lazy’ season. Like, if Autumn were a person I feel as if it would just stay home and watch Netflix while Summer, Winter and Spring were off at the gym, you know? Basically, Autumn is a seasonal representation of myself.

Naturally, this means that the next few weeks for me will just be a series of consecutive lazy days – (much like the majority of my life, but we can ignore that part).

Of course if you’re a true Master of the Art of Laziness like myself, you’ll know that a lazy day is incomplete without a deliciously autumnal snack to go with it (because there’s no use trying to master the lazy lifestyle if you’re not committing to an unhealthy diet as well 😉 ). These simple syrup cakes make a perfect, cosy sweet treat on a rainy day and only take a couple of minutes to make!

Let me know in the comments below what other fall recipes you guys want to see this month and make sure to like and share this post if you enjoyed it :). Also in case you guys missed my previous posts,  my 1 year blogiversary is coming up on the 26th of October and I’m trying to reach 3000 followers! If each of you could help me out and get one other person to subscribe to Artsy Teen I’d achieve my goal in no time!

Now without further ado, let’s get into this recipe…

signature


Ingredients  (Makes 20 Buns)

syrup-buns-5b

250g butter, softened

200g caster/granulated sugar

3 eggs

500g

300ml golden syrup, plus a few tbsp for drizzling on top of buns

50ml milk

Method

  1. Preheat oven to 180’C (350’F) and line  a muffin tray with 20 paper cases.
  2. Cream butter and sugar together, then beat in eggs.
  3. Warm the golden syrup in a microwave (or in a pan over a low heat) until it’s runny. Add to the mixture and beat well.
  4. Add the flour and milk. Mix until well combined.
  5. Spoon the mixture into paper cases and bake in the oven for  15-20 minutes (or until the cakes are golden and springy to the touch).
  6. Remove the buns from the oven and drizzle a teaspoonful of syrup onto each bun while they’re still hot.


FOLLOW ME ON SOCIAL MEDIA🙂
1456098962_twitter1on Twitter
1456098967_pintereston Pinterest
on Bloglovin’
on Instructables

DIY Modern Geometric Wall Art

hey

How are you guys doing? I know, I know…I haven’t posted in two weeks. I’m a mess. An embarrassment to bloggers around the world. But honestly, I actually have a valid(ish) excuse this time! See, on top of schoolwork, piano practice and not going to the gym, I’ve been spending most of my free time working on putting together a portfolio to go to design college next year. I’ve also been spending a lot of time watching  cookery videos on Youtube, but we can just ignore that part. Seriously though, on a side note, if any of you guys are putting together an art porfolio or have done so in the past  please comment below and let me know if you have any tips/advice to share!

Anyways, now that I’ve wasted one paragraph defending my inability to stick to a blogging schedule, let’s get back to the DIY, shall we? A few weeks back I made this cool geometric wall art but never got around to editing the photos and writing down the tutorial. It’s just been hanging on my bedroom wall staring at me accusingly ever since, so today I finally got around to finishing the post and sharing it with you guys! It’s such an easy and inexpensive way to add a modern, trendy touch to your room. Plus, you guys can personalise it by experimenting with different coloured crepe paper and triangle sizes to suit your own style! I’m so happy with how this one turned out – I think the the colour scheme is perfect for autumn and the combination of PVA glue and crepe paper creates a really interesting texture and visual effect on top of the card.

Oh and by the way, if you guys enjoy my DIYs and want to see more of them make sure to check out my Instructables account  where I have a bunch of other tutorials that haven’t been posted on my blog! And now, without furder ado, let’s make some Triangle Wall Art!

What you need

wall-art-2

PVA Glue

A3 sheet of thick Card paper

Crepe paper in 3 different colours

Scissors

Gold Paint *optional

Steps

wall-art-3

  1. Cut out three large triangles from the crepe paper (one in each colour).
  2. Arrange paper triangles onto the card in an overlapping vertical pattern.
  3. Carefully glue down the triangles with the PVA glue.
  4. Leave to dry and you’re done! I also painted on a few gold designs  to make the wall art a little more exciting.

wall art 4.jpg

Make sure to like and share this post if you enjoyed it, and subscribe to Arsty Teen to be notified every time I upload a new post!
signature
FOLLOW ME ON SOCIAL MEDIA:)
1456098962_twitter1on Twitter
1456098967_pintereston Pinterest
1458587945_instagram.pngon Instagram

10 Things I’ll NEVER Understand

Not that the list of things I will never understand is limited to 10 items, but if I tried to list all of them this would be an incredibly long and boring post 😉 . I hope you guys are all having a good weekend! How are you finding back to school season? I’ve officially started Sixth Year (which in the Irish system is the last year of school!) and let’s just say it’s been a pretty crazy two weeks. Anyways, I don’t want to make this introduction too long so without further ado, here are 10 Things I’ll Never Understand…

1. My Own Handwriting

manuscript-1072355_1280.jpg

I’m not sure how this happened, but at some point during my education I must have skipped over the whole ‘handwriting’ phase. I mean obviously I can write – but I swear it’s the most illegible bunch of scribbles you’ve ever seen.  Every single year, teachers will tell me to “sort out that handwriting” and I try, I really do, but no matter what it still looks like a bunch of hieroglyphs waiting to be deciphered. Honestly I don’t know why secret services waste time and effort designing new, intricate codes when they could just use my handwriting.

2. Six inch heels

piecing-shoes-319166_640

Well, actually any height of heel – I just wanted reference the Beyoncé song (if you haven’t listened to it, stop reading and go look it up right now). Seriously though, how do those stiletto-wearing women do it? I tripped on a pavement once wearing flats and broke my arm (true story), so in tall heels I’d just be a walking (well, falling) disaster!

And I’d love to know when exactly people learn to walk in heels. Cause it seemed to me like one minute everyone was rocking light-up sneakers and the next strutting around in stilettos. Is there some sort of heel-walking college people attend that I don’t know about?

3. My inability to unlock my own phone

cell-phone-1235402_6402

Ok, please tell me I’m not the only one who does this. I can’t tell you guys the amount of times that I’ve actually locked myself out of my own phone just because I repeatedly messed up on the pattern-lock-thingy.  And then I have to go through the 30-second-wait-of-shame before trying again. You know, it’s just like when I’m trying to log in to my email account and I get the password so wrong that the little ‘Prove you’re not a robot’ image comes up. Then I fail at the robot test as well and start questioning whether or not I’m even human. The whole thing’s just an unnecessary stress in my life.

4. People who order water at restaurants

cup-939479_640

So this may just be me because I don’t go out to restaurants often, but I just don’t get people who go to restaurants and pay for a glass of water. Are you crazy? You went through all the trouble of googling a nice restaurant,  dressing up, driving over here and reading through the menu – so you can end up ordering water?  I mean look at all these cool drinks; you’ve got the tropical fruit juices, the overpriced fizzy drinks, the weird cocktails – you are wasting an opportunity, my friend. Honestly, you may as well have stayed home and had dinner with your tap.

5. People who order salad at Mc Donald’s

top-view-1248955_640

While we’re on the topic of annoying people eating out, let’s talk about that one friend we all have who orders some “nutritional” vegetarian dish while the rest of us are getting burgers. Now I’m all for a healthy lifestyle and everything, but to me going to a fast food restaurant and ordering a salad is just contradictory. Do you go to gyms to buy chocolate? Do you go to the Sahara desert to buy winter coats? Then why would you order a salad, when there’s plenty of junk food to choose from?

6. Perfume commercials 

flowers-1457676_640

I would love to go to one of the meetings where filmakers have to discuss the ideas for a perfume commercial. Because I’m pretty convinced everyone there must be on drugs. Seriously, can you imagine a serious director standing up and pitching his concept just like “I have a vision for the latest Chanel perfume. I’m thinking flowers, sheets randomly floating around a woman, a tsunami wave, and most importantly no evident storyline whatsoever”. Am I right or am I right?

7. Make up Abuse

brush-1367784_640

Now, I have nothing against wearing a bit of make up, but when I go outside and see women with three coats of orange paint on their face – I start to worry for society. Is someone going to build a house on your face? No? Then why is all this foundation necessary? And what’s even more crazy is the price people pay for the make up products. Like if it were me, I’d just go down to the costume shop and bulk buy face paint. It’s cheaper and equally ridiculous.

8. Bungee jumping

extremely-unusual-conditions-664132_640

Correct me if I’m wrong, but isn’t it usually human instinct to try and stay alive? Because to me, willingly throwing yourself off a cliff doesn’t sound like you’re trying to stay alive. And I know people say it’s for “the rush of adrenaline” or “the relief you feel afterwards”. See, here’s the thing. You don’t have to feel relief, if you never put yourself in the situation in the first place. But hey, if it takes a near-death experience for you to “feel alive” allow me to randomly throw knives at you while you’re strapped to a spinning wheel. Because that  makes just as much sense to me.

9. Conversations with Dentists

dentist-542252_640

So you know when’s the perfect time to strike up a conversation? Well, according to my dentist, it’s when my mouth is being jabbed with six different sharp objects. And I know, I know… they’re just trying to be “friendly”. But seriously, what do you want me to do? Communicate with my eyes? Do sign language with my tongue?

10. How I managed to reach 3000 followers in one year!?

3000?.jpg

Ok,  wait. So technically that statement isn’t true…yet. But hopefully it will be soon! See, my 1 year ‘blogiversary’ (apparently that’s what the cool kids call it) is coming up in a little over month. And, I was hoping you guys would help me reach my goal of 3000 followers by October 26th! How, you might ask? Well, if each one of my followers just got one other person to subscribe to Artsy Teen – I’d reach my goal in no time! So if you guys know someone who might enjoy my crazy ramblings, DIYs and attempts at humour, please please send them a link to my blog!

That’s all for today…talk to you guys next week :).

signature

Guest Post: Art, How I See It


Hi, everyone! My name’s Elm, and I blog over at Just Call me Elm or Something. I’m collaborating with the lovely Maya, which honestly makes my day!

Before anything, I want to tell you what I can see – or rather, what I can’t see. Far be it for me to define myself by this, but I’m blind. I can see nothing out of my right eye, and only light, contrasts and a few shapes out of my left. I couldn’t see faces, beautiful landscapes or anything of the sort. I despise getting pity for it; I’ve always been blind and have never seen anything different from what I do now, and so I view it as normal. To set the scene, I needed to tell you, so that you understand.

Because of my lack of vision, it may be surprising to you that art is actually quite important to me. There are beautiful paintings, filled with life and sweeping brushstrokes; there are natural landscapes, intricately carved with the path of water and faces of rock that hold swirling patterns. Captured in ink, paint or photography, it is ever present and unchanging, an image that could be interpreted in a thousand different ways.

That is art to you. Doesn’t it appear beautiful? To me, it is; I’m always fascinated by what people can do to make a picture come alive, to their eyes, to make it appear striking, stunning or just real.

What many people don’t see is that art isn’t just visual. A blast of trumpets, an angelic voice singing or buskers on the street is what I consider to be my paint, my canvas, my pencil. It may seem stereotypical, that a blind person talks about music as if it’s the only thing that they appreciate, but I still have ears.

If you pick up a book with glorious writing, you think, “I wish I could be there, though the author has done an amazing job of helping me visualise it.” The same could be said for me: I’ve never seen a stream tumbling over the rocks, but I can almost imagine the sound, the way it would feel. Now I think on it, THAT is another form of art. To take the written word and to transform it into something else, for even only a few people, helps people to know what something out of their understanding would be like.

They tell me, “Isn’t it a shame that you can’t see the amazing art work she’s done?” I say yes, and then no. I’ll never experience it, but I can be told how beautiful it is. I can be transported into the world of colours and sight, only for a second: a bystander, but still there.

Everything is a form of art, when you look deep enough. To a deaf person, a drawing may be appreciated so much more: who knows? I have never been told, not by someone who could show me the world of what it’s like to not hear sound that I take for granted. That’s why I’m telling you my version, so that you can at least see one perspective.

What I want to show you is that every single person’s version of art is different. Perhaps you suspected that I would talk about music, or writing, but if you think that’s the stereotypical blind notion of what art is, you’d be wrong. I’m different, you’re different and the closest person to you is different.

Even if you don’t get a single thing out of this post, I want you to remember that some people don’t have the things you have. Be that vision, hearing, an arm or a house. This isn’t just about art; it’s about realising that even when someone has a disability, or has something “lacking”, they still continue on with their life. It’s not the end. I may get upset sometimes that I can’t see the stars, or pictures on somebody’s blog, but it doesn’t stop me from finding creativity in other places.

What do you think art is?

I’d like to thank Maya for having me on her blog. She’s a truly wonderful person, and for her to ask me to collaborate put a smile on my face. I really hoped you enjoyed reading, because whilst I was writing, it helped me to think about my own perceptions and judgements.

From Elm 🙂

DIY Lemon Face Scrub for Glowing, Clear Skin

hey

Have you guys tried the latest ‘Sodium sulfacetamide acne cleanser with extracts of zinc and false advertising’? or maybe the ‘97% non-toxic facial wash gel tried and tested by the tooth fairy’? OK, maybe I’m exaggerating…but just barely. It seems like cosmetic and pharmaceutical companies are constantly coming out with new types of soap and giving them increasingly elaborate and ridiculous names. Am I right or am I right? And it would be one thing if these seriously expensive chemical concoctions actually worked, but honestly I’m pretty convinced that the majority of them aren’t that great.

Luckily, I discovered this all natural DIY face scrub a few weeks ago and haven’t stopped using it since. It uses healthy, natural ingredients that you probably already have in your kitchen and leaves your skin feeling  smooth and refreshed!

You guys should definitely try it and let me know what you think in the comments below. Also, don’t forget to ‘Like‘ this post if you thought it was kinda helpful or interesting or you just feel like being nice :).

Now without further ado, here’s the DIY…

What you need

face scrub ingredients

1/2 cup granulated sugar

1 tbsp olive oil

1 tbsp honey

1 tsp lemon juice

  1. Mix sugar, oil, honey and lemon juice together (if you think your scrub is too thick, just add some more oil).
  2. Wash your face with warm water.
  3. Apply the scrub to your face and gently rub in a circular motion.
  4. Leave it on for 5 minutes.
  5. Rinse your face with cool water.
  6. Feel energised and rejuvinated and all that crap ;).

signature

DIY Popsicle Stick Coaster

hey

I thought I’d start the week off with a bit of DIY! Many people don’t know this about me but I actually drink quite a lot of tea (I don’t know why I made that sound like it was some sort of secret, intriguing fact about me. It’s really not). Especially when I’m blogging, I like to have a cup sitting on my desk beside me while I type. That being said, I very rarely have a coaster at hand and as a result have ruined many a table (OK actually I’ve only ruined one table – my own, repeatedly, and to be honest it was already pretty ugly in the first place).

Instead of going out and buying a coaster I decided to DIY one instead.  I have to say I’m really happy with the end result; it’s colourful, trendy and unique! You can either buy a pack of popsicle sticks or use this as an excuse to buy a large pack of ice lollies, which is undoubtedly the better option ;).

Make sure to like this post if you want to see more DIYs like this one and comment down below letting me know what your favorite kind of hot drink is. Are you a coffee kind of person? A hot chocolate lover? A herbal tea drinker like me? And I know you’re probably wondering why I’m going on about hot drinks in the middle of summer but just remember that I live in Ireland and I’m currently wearing a jumper in July.

Anyway, enough rambling. I hope you all have a lovely week, now let’s get into the tutorial…

What you need

coaster 2

17 popsicle sticks (this might vary depending on how big you want your coaster to be/ the size of your popsicle sticks. I used a few small popsicle sticks for the base because I ran out of big ones, but honestly it doesn’t really matter)

Paints in the colours of your choice (my popsicle sticks were already dyed, so I just used a bit of gold paint to add some decoration)

Paintbrush

Glue gun

Steps


1. Paint your popsicle sticks and leave them to dry.

2. Next take 10 popsicle sticks and glue them together in pairs (see photo). These will act as the base of the coaster and give it some height.


3. Glue the remaining 7 popsicle sticks  on top of one of the popsicle stick pairs that you glued together before.

4. Glue the rest of the popsicle stick pairs onto the  base of the coaster.

5. Leave to dry and you’re done!

signature

Pros and Cons of Having NO Social Life

  hey

I’ve been on Summer Break for the past couple of weeks enjoying the lack of homework and remaining in denial of the fact that next year is my last year of school. But you know one thing that holidays tend to do is emphasise the fact that I really have no social life. I mean, of course when I’m at school I socialise, but when I’m at home there are just so many other important things I have to do. Like eating…and blogging…and eating…

Anyway it got me thinking, maybe this whole social life thing is overrated. Maybe being antisocial is where it’s at. So, like the logically minded person that I am, I decided to figure this out by putting together a list of the Pros and Cons of Having No Social Life.

Let me know in the comments below if you can relate, or if you actually have friends and just feel sorry for me ;). Also, comment if you have any suggestions for future ‘Pros and Cons of…’ Posts.

I hope you guys like it, as always it’s just a bit of fun! Now without further ado, here are the Pros and Cons of having No Social Life…k

smartphone-791179_640

Pro Your phone isn’t buzzing all the time with notifications.

Con That feeling of disappointment when you finally get a text and it’s from the phone company.

fashion-1031469_640

Pro You don’t have to waste money buying new clothes because you’re always at home

Con You literally wear the same three pieces of clothing over and over again.

ipad-605440_1280.jpg

Pro You don’t have to deal with all the drama that comes with socialising.

Con The most exciting part of your day is finding out what the latest google doodle is.

yellow-car-1119992_640

Pro Your parents don’t have to drive you everywhere.

Con Your parents start worrying as to why they don’t have to drive you anywhere.

books-1224757_640

Pro You can take part in marathons…reading and movie marathons that is.

Con The lines between reality and fiction begin to blur…

chips-843993_640 (2).jpg

Pro You don’t have to share your food with other people.

Con This results in a pretty unhealthy diet, but you’re OK with that.

2000 followers

Pro You have more time to be creative.

Con There are none! Okay so maybe I’m not a social butterfly, but if I was I probably wouldn’t have this blog and all my amazing readers! And on that note (awesome segue),  Artsy Teen just reached 2000 followers so I wanted to take a second thank all of you guys so much for reading my posts every week, and encouraging me to keep up my creativity!

. . .

Enjoy the rest of your week 🙂

signature


Rich Chocolate Brownie Recipe

Every once in a while we all crave something rich, decadent and chocolatey (unless of course you’re allergic/don’t like chocolate, in which case you’re unfortunately missing out on one of the great joys of life). The summer holidays are a great time to bake a batch of brownies and share them with friends and family (or alternatively, enjoy them by yourself on the couch while watching your favourite TV show 😉 ). For years this has been my go-to brownie recipe and I’ve included step-by-step photos to make sure it’s really easy to follow. I thought this was the perfect thing to post on Father’s Day, since I’m absolutely certain that no Dad could resist freshly baked brownies. Let me know in the comments below what you guys like to bake/do during the holidays and if you found this recipe helpful!signature

k

k

Ingredients

brownies ingredients

100g/ 1/2 cup butter

175g/ 3/4 cup caster (granulated) sugar

175g / 1/2 cup dark muscovado sugar

125g dark chocolate

1 tbsp golden syrup

2 eggs

100g / 3/4 plain (all-purpose) flour

2 tsbp cocoa powder

1/2 tsp baking powder

Method

brownies 1

1. Gently heat butter, sugars, chocolate and golden syrup in a heavy based saucepan. Stir until mixture is smooth. Remove from the heat and leave to cool.

brownies 3

2. Beat together eggs, then whisk in the cooled chocolate mixture.

brownies 4c

brownies 4

3. Sieve together the flour, cocoa powder and baking sugar and fold into the egg and chocolate mixture.

brownies 5

brownies 6

4. Mix until ingredients are well combined.

brownies 7

5. Spoon the brownie mixture into a lightly greased cake tin and bake in a preheated oven at 180’C/350’F for approx. 30 minutes, or until the top is crisp and the edge of the brownie starts to shrink away from the tin.brownies 8

6. Technically, you’re supposed to leave the cake to cool before cutting it into squares to serve. However, seeing as you’ve put in all this hard work, I think its perfectly acceptable for the chef to try some while it’s still warm ;).

brownies 9


The Ultimate Summer Bucket List

hey

How are you guys? I know, it’s been a while :/ I’m so sorry I haven’t posted in ages – I’ve had exams and bad wi-fi connection over the past few weeks, which really aren’t the best combination for blogging. But excuses aside, I am now off school for the next few months which means I can at last focus on my blog again! I’ve got tons of exciting posts planned for you guys this summer, and I’m kicking things off with the ultimate holiday bucket list!

I don’t know about you, but every year I have so many amazing plans for the holidays and then before I know it, summer’s over and all I’ve accomplished is spending three months binge watching Netflix. But this year, I’m determined to be productive, try new things and visit new places (ok, and maybe binge watch Netflix just a little). Let me know in the comments below what plans you have for the holidays and if you have an recommendations for a good TV series I can get addicted to over the summer. Now, without further ado, here’s 20 ways to have the best summer ever 🙂

1. Have a Campfire/BBQ

fire-842311_640

Nothing screams ‘summertime’ more than having a barbecue with your neighbours (I’m pretty sure they only do that in movies, but who knows) or roasting smores over a campfire. Just make sure you don’t burn your house down!

2. Have a picnic on the beach

pineapple-918877_640

I’m pretty sure it’s an unspoken law that you have to go the beach at least once during the summer – or if you don’t live near the coast, a pool or lake or something. Either way, having a picnic by the sea with some friends and family is an inexpensive outing that is always fun and memorable!

3. Travel the world!vw-camper-336606_640

Whether you’re flying abroad or going on a roadtrip with some friends, discovering new places is an essential part of summer time. This year, I  saved up to go with some friends on a trip to Germany, Italy and Slovenia – I can’t wait!

4. Embrace your inner bookworm

books-918521_640

I’m not saying that everyone loves reading, I’m just saying that if you don’t you need to reevaluate your life choices. I used to be an avid reader, but recently I’ve noticed I haven’t been reading enough. This summer, I plan to raid the library and get back into the joys of literature!

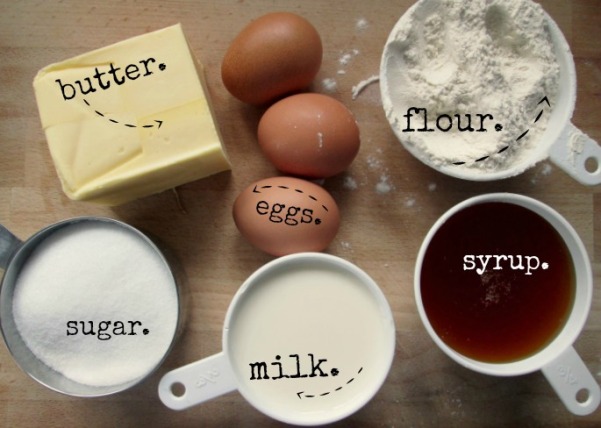
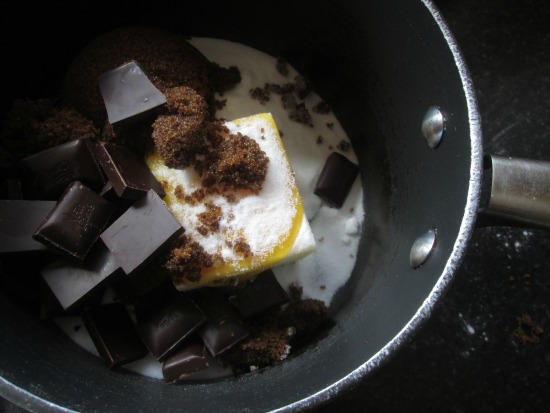
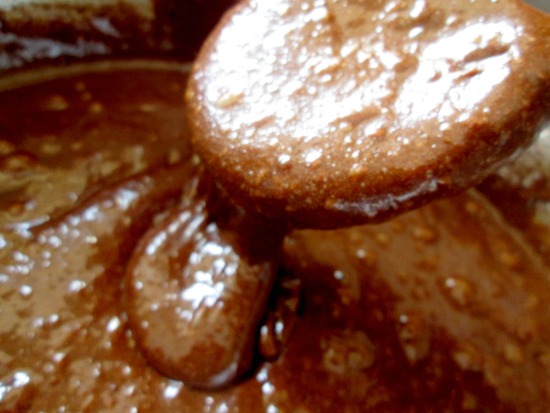
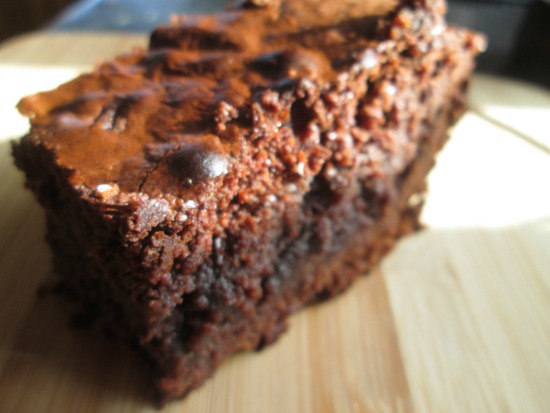
5. Bake some cookies

cookie-dough-960897_640

Well, not necessarily cookies – any food will do (though if you are a cookie fan, make sure to check out my super easy Chocolate Chip Cookie recipe 😉 ). If you guys like cooking/baking as much as I do, I’m sure you also have a few recipes that you’ve always wanted to try out, but have never been brave enough to! Well, let’s make this the summer where we face our culinary fears and attempt to cook those complicated recipes.

6. Go to a concert

concert-768722_640

Concerts and music festivals are always something I want to do over the summer, but never get around to attending (usually because I’m broke). But for the first time, this year my friend and I are going to see Beyoncé perform live up in Dublin on July 9th, which will no doubt be amazing!

7. Get crafty! 

paint-933395_640

You guys know I “get crafty” all year long, but in my mind three months of holidays is just an excuse to spend even more time diy-ing! I got this tie dye kit for Christmas (like two years ago) and I’m definitely going to be trying it out this summer.

8. Learn a new skill

surfboard-690904_640.jpg

Summer is the perfect time to learn new skills, whether that’s trying out a new sport for all you strange athletic people, learning how to drive or taking up an unusual hobby. Personally, I’m going to look into taking part in a photography course this year.

9. Eat ice cream

ice-cream-770994_640

Forget Romeo and Juliet‘s love story. A few years ago I went on holidays to Florence, Italy and tried gelatos. I have loved ice cream ever since.

10. Dye your hair

pink-618022_640

Admit it – you’ve always secretly wanted to dye your hair some crazy colour. Well, I think this is the year that you should woman up and do it (just ask your parents first). I tried getting a purple ombré look last year, though instead of the vibrant, violet locks I’d hoped for I was left with was half of my hair having a barely noticeable maroon-y tint. This year, I think I might just go for some highlights. If you don’t want to damage your hair, colourful extensions are a good alternative too.

11. Make a smoothie

smoothie-456814_640

Or get someone else to make you a smoothie. Either way, summer is the perfect time for cold, fruity drinks and smoothies are way healthier than a can of coke.

12. Have a movie night

popcorn-1085072_640

Instead of spending money on overpriced popcorn and tickets at the cinema, invite a couple of your girls over to spend the night. Just open up Netflix, grab some snacks and let the movie marathon begin!

13. Celebrate an obscure holiday 

sparkler-1149641_640 (1)

Everyday of the year is dedicated to a different, unusual holiday and most of them you’ve never even heard of! So this summer, why not research a few ‘obscure’ holidays , choose one (preferably the most bizarre) to celebrate and go all out. Personally, I love any excuse to celebrate, so I’m definitely going to be trying this out. I mean, when something as wonderful as ‘corn on the cob day’ exists, how could you not celebrate it?

14. Take photos

camera-820414_640

Now I’m not saying act like one of those infuriating tourists who just take pictures of everything, but I do think its really nice to take few photos to keep as souvenirs. At the end of the summer, you can even put together a little scrap book.

15. Learn Origami

origami-827901_640.jpg

Cause I mean, why not? It’s such an underrated art these days.

16. Have a henna tattoo party

henna-691901_640 (1)

A fun way to spend an afternoon is to invite a few friends over and give eachother henna tattoos. For those of you who don’t know, henna is a plant-based dye that is used in various Cultures (notably in India) as a sort of temporary body tattoo. Now, it’s starting to become a trend around the world! You guys can check out my step by step Henna Tutorial to learn the basics.

17. Play a board game

board-761586_640

As a kid, I used to play board games all the time with my brothers and things would get pretty competitive! This summer, I think I’ll spend a little time reminding my family that I’m still the undisputed Champion of All Board Games ;).

18. Focus on a project

keyboard-338502_640

During the rest of the year, there’s so much going on that sometimes we tend to avoid getting involved in big projects. Summer’s the perfect time to really focus on a larger task that’s a bit time consuming. As I said, this year I want to dedicate a lot of time to blogging and also to working on my portfolio for art college (by the way, if any of you are making/ have made a porfolio, please leave any tips in the comments below! They’d be much appreciated).

19. Be Spontaneous

road-926315_640

When I’m at school, my life tends to become a routine and the weekdays all start to blur into one. Even though it can be nice to have a plan, it’s also fun to just be a little spontaneous once in awhile, like randomly going out to lunch with your friends or suddenly deciding to visit somewhere new!

20. Watch a sunset/sunrise

lake-696098_640

Even a cynic like me can appreciate a beautiful sunset or sunrise. Hopefully I’ll see one this summer (if I manage to wake up early enough) and maybe even take some nice photographs!

all photos are courtesy of http://www.pixabay.com

signature
FOLLOW ME ON SOCIAL MEDIA:)
1456098962_twitter1on Twitter
1456098967_pintereston Pinterest
1458587945_instagram.pngon Instagram
on Bloglovin’
on Instructables

DIY Summer Fruit Garland

hey

I hope you’re all having an amazing week! Here in Ireland we got a whole two hours of sunshine today, which can only mean one thing… summer’s finally on its way. Now I know summer technically starts in June, but I thought we could get a head start. Plus, in my opinion there’s never a wrong time to hang up a bunch of paper fruit in your room. This DIY is the first of a series of DIY room decor posts I’m planning, so let me know in the comments below if you guys have any ideas for spring/summertime decor!


What you need:summer garland 3

  • red, yellow, dark green, light green card paper
  • twine
  • sharpie
  • scissors
  • glue
  • sticky tape or glue gun*

*If you’re using a glue gun, please be careful. I’ve burned myself countless time with hot glue and I can tell you it’s not fun.

  1. Cut out pineapples and watermelons from coloured card.I feel like this step is pretty self-explanatory, but basically I recommend just sort of randomly cutting out shapes until they look somewhat fruit-like. I’m sure you’ll figure it out, but if you’re really struggling just google watermelon and pinapple templates and you’ll probably find something helpful.
  2. Glue the shapes together and draw little seeds onto the watermelon with the black sharpie.
  3. Using tape or a glue gun, stick the paper fruit to your twine.
  4. Leave glue to dry and hang your garland up on the wall. And voilà, just like that you’re room’s transformed into a tropical paradise, more or less ;).

signature


FOLLOW ME ON SOCIAL MEDIA:)
1456098962_twitter1on Twitter
1456098967_pintereston Pinterest
1458587945_instagram.pngon Instagram
on Bloglovin’
on Instructables